
Using Digital Passes to Recognise Customers
Get Apple or Google Wallet passes to use for myne loyalty
Published · Updated
 Lakshey
Passes are automatically generated after a customer connects with your business, giving them a simple, reusable way to identify themselves in venue.
What is a pass?
A pass is a digital customer card that includes:
Customer name
Phone number
A unique reference ID
A scannable QR code
Each pass is directly linked to a customer profile in myne.
Customers can:
Save it to Apple Wallet / Google Wallet
Or access it via the promo confirmation screens

How customers receive a pass
Passes are automatically created at the end of key customer flows:
1. QR code check-in (in venue)
Customer scans a QR → enters details → receives a pass
2. Dynamic Connection Page (DCP)
Customer scans a QR → views offers/promos → enters details → receives a pass
3. Promotion link (SMS or campaign)
Customer opens a promo link → enters details → receives a pass

Using passes at the POS
When a customer returns, they simply:
Open their pass on their Apple/Google Wallet App
Show it to the staff
Staff can then:
Scan the QR code
Click 'Add Customer' then in the bottom right, click 'Scan Card' to pull up the camera.
If a POS does not have a scan capability then linking via phone number or name is available
Or, Search the reference ID manually (e.g. GL2D9F)
The pass is linked directly to your POS via myne integrations (Square, Lightspeed O & K Series), where the reference ID is stored against the customer profile. This allows staff to instantly find and recognise the customer during checkout.
Example use cases
Customer redeems a promotion via text → shows pass at counter
Customer checks in → shows pass to be recognised
High-volume venues use passes instead of asking for name/email
Once card linking is performed to a customer account, a pass does not need to be shown every transaction to allow redemption of points and promotions.
Once a customer unlocks a promotion, the pass is a great way for them be added to the POS transaction to redeem an offer.
Branding
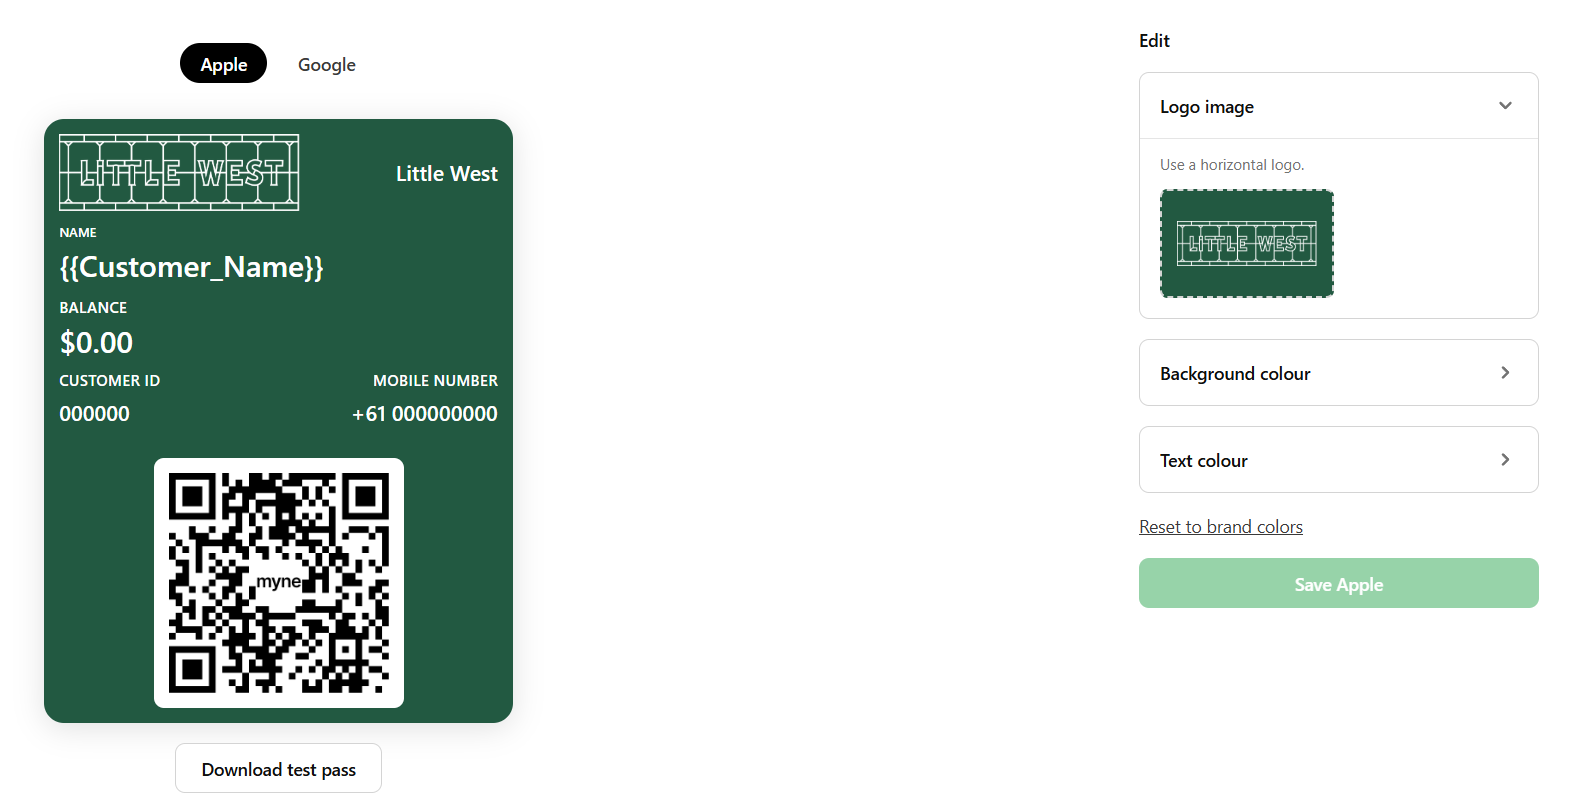
Passes can be configured to fully match your brand's design, look, and feel. From logos and primary brand colours, the passes can be designed however you want your customers to see it on their device.
Open Settings → Brand → Passes.
Switch between Apple and Google. For each, set Logo image and Background colour. On Apple you can also set Text colour. Use Reset to brand colors if you want to start from your Brand Style colours again.
If you run both points and cashback, Fields lets you choose which value shows on the pass.
Select Save Apple or Save Google. Changes apply to new pass downloads going forward. Passes already on customers’ devices are not updated immediately when you save.
Use Download test pass (Apple) or Open Google test pass to check the look on a device. Save first if you have unsaved changes.
To align colours with the rest of your brand, see Set your branding.
Summary
Passes give your customers a simple way to identify themselves, and your staff a fast way to find them.
They:
Work across QR check-ins, promotions, and campaigns
Persist in Apple/Google Wallet
Sync directly with your POS
Enable seamless in-venue recognition
This bridges the gap between digital connection and real-world service — making customer identification fast, reliable, and scalable.